Tech Project: TrueNAS Scale Server 1.0
It's the holiday season, so I'm taking a break from the OPNsense project for a few reasons:
- The various patches don't seem to have any FreeBSD Intel WiFi driver improvements, so the connectivity issues aren't being solved.
- The OPNsense roadmap shows that a new version should be dropping in January.
- I can't really progress any further with the project beyond some minor setup, because no consistent connection = no consistent monitoring.
Instead, I'll be pivoting into a different tech related project: building a TrueNAS Scale server!
The Backstory
This project has a really simple backstory, in two parts.
- I had working computer hardware left over from when I rebuilt my gaming computer to use a Ryzen 7 7800X3D and an RX 7900 XTX.
- My father was very impressed by his friend's Plex server for streaming his media collection in the home.
Since I was already planning to repurpose the old hardware into a server, everything synergized quite well.
The Hardware (Internal)
The actual hardware that's going to be running TrueNas Scale is an interesting hodge-podge of parts I've picked up over the years.
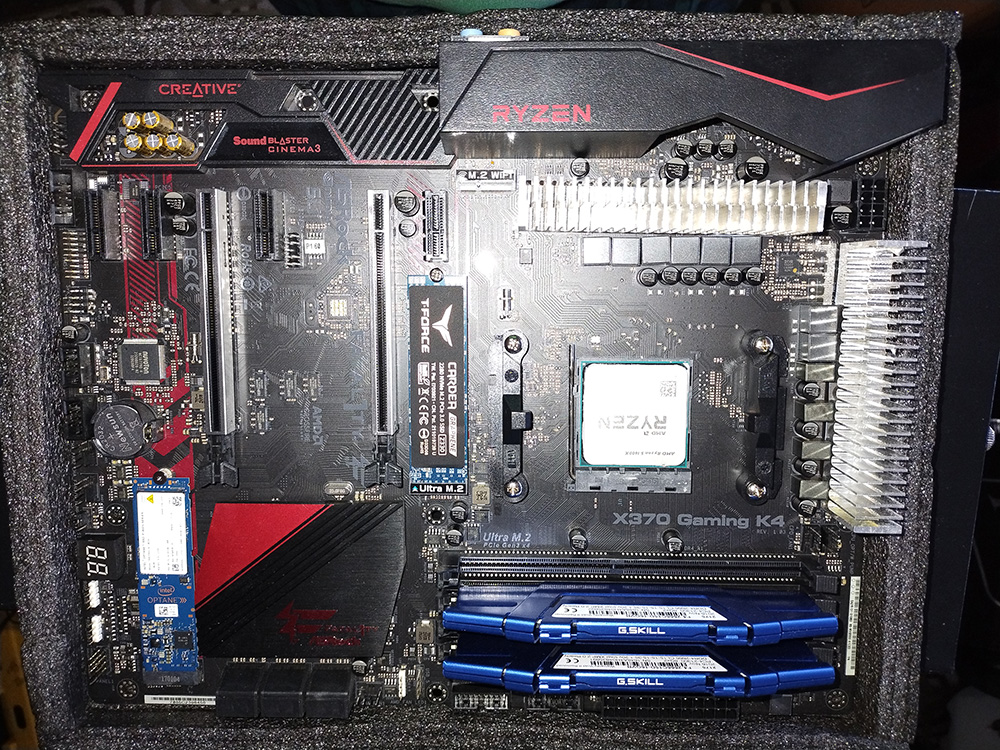
The main guts of the system - the CPU, RAM, and motherboard - date back to when I originally built this to be my gaming rig. I jumped on the first generation of Ryzen in 2017 with an R5 1600X, DDR4-2666, and an AM4 X370 Gaming K4 motherboard. The motherboard in particular is the reason why I never did an in place upgrade like most other AM4 owners.
The primary reason was that the X370 Gaming K4 was badly designed, with poor circuitry connecting the RAM to CPU. It was end of life'd only a few months after Ryzen hit the market.
The second reason was that it was designed before BIOS Flashback, which does not require you to have a CPU to update the motherboard BIOS, was invented, so updating the BIOS is a huge pain.
However, I did do some customization to the motherboard. Back in 2018, when I was wrapping up training to be a CNC machinist, I made custom heat sinks for the motherboard's Voltage Regulator Modules (VRM). The board shipped with fairly low surface area heat sinks, so I grabbed some blocks of scrap aluminum, wrote up a CNC program, and milled new heat sinks. These might survive the eventual scrapping of this hardware, either as paperweights, or as actual heat sinks.
The CPU cooler was another old piece of hardware I had gotten to go with the Ryzen 5 1600X. The Cryorig H7 was a pretty cheap air cooler at the time with two main flaws:
- Excessive curvature of the contact plate.
- An awful installation method:
In fact, this miserable method of installation caused me an absurd amount of grief trying to properly align the bracket for maximum contact.
I had a PCI-3.0 NVMe drive lying around from when I owned an AMD Dell laptop... which died a few days after the warranty expired. So I installed that as the OS drive, since it had an integrated heat sink on it.
Following the advice of Level1Techs, I picked a 118GB M.2 Optane stick, back when they were still available for purchase. This is going to be a cache drive for the TrueNAS metadata, which should give me some solid performance boosts.
Because the Ryzen 5 1600X has no internal graphics, I needed a graphics card for the system to even boot. Luckily, I had an RX 580 8GB lying around, which used to power my brother's gaming rig, until I replaced it with the RX 6600 I had been using until I obtained the RX 7900 XTX. While not the most efficient GPU, it was more than enough to do the job.
The Hardware (Case)
The biggest headache of the modern era is that computer cases with 5.25 inch and 3.25 inch drive bays are becoming less common. This makes sense, as 2.5in and NVMe SSDs with larger capacities easily fulfill the capacity needs of many people, and data redundancy isn't really something they think about.
(Also, if we're going to be honest, there just isn't a Keep It Stupid Simple backup solution for most people.)
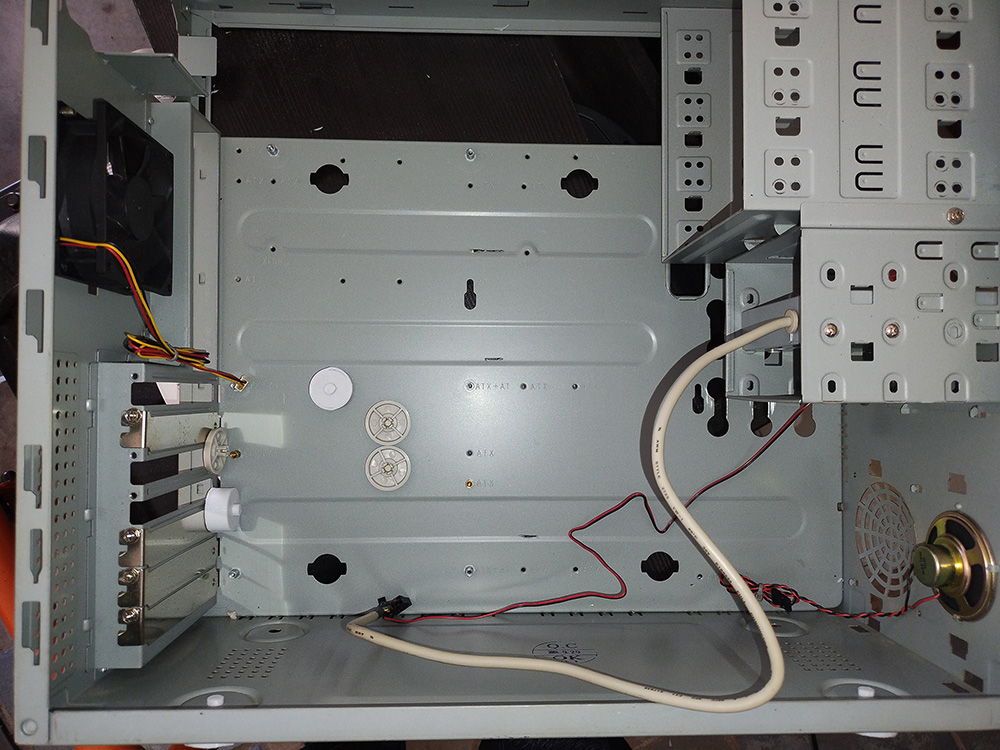
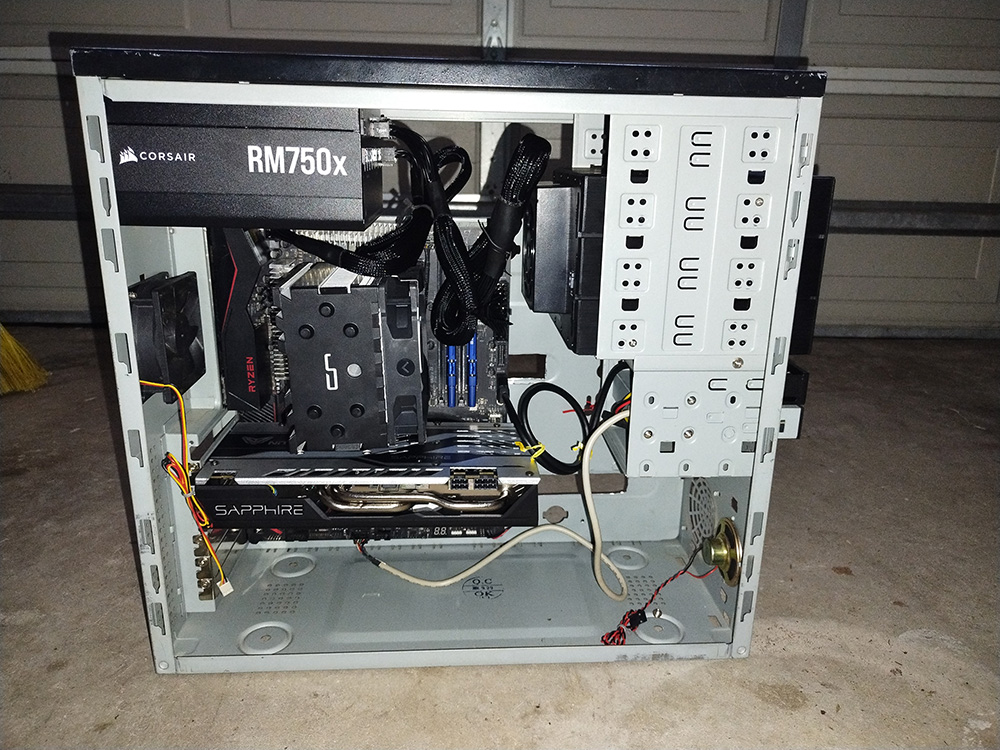
Luckily, my father's friend had an old PC gathering dust in a corner that had 5.25in drive bays. It even had 5.25 to 3.25in drive sleds... for only 3 drives. And an old, obsolete CD drive. And a floppy drive. And the shortest feet possible for a case.
Amazingly, the thing did boot and was apparently running Windows XP, so I had the job of shucking the hard drives to be returned to the original owner, in case anything valuable was on there.
After gutting the case for cleaning, I decided to ditch the hard drive sleds, since I wanted to implement a RAID 10 configuration or something similar in TrueNAS. I also noticed the lack of cable access/management paths, air flow, and all the other problems that cases from 20+ years ago had.
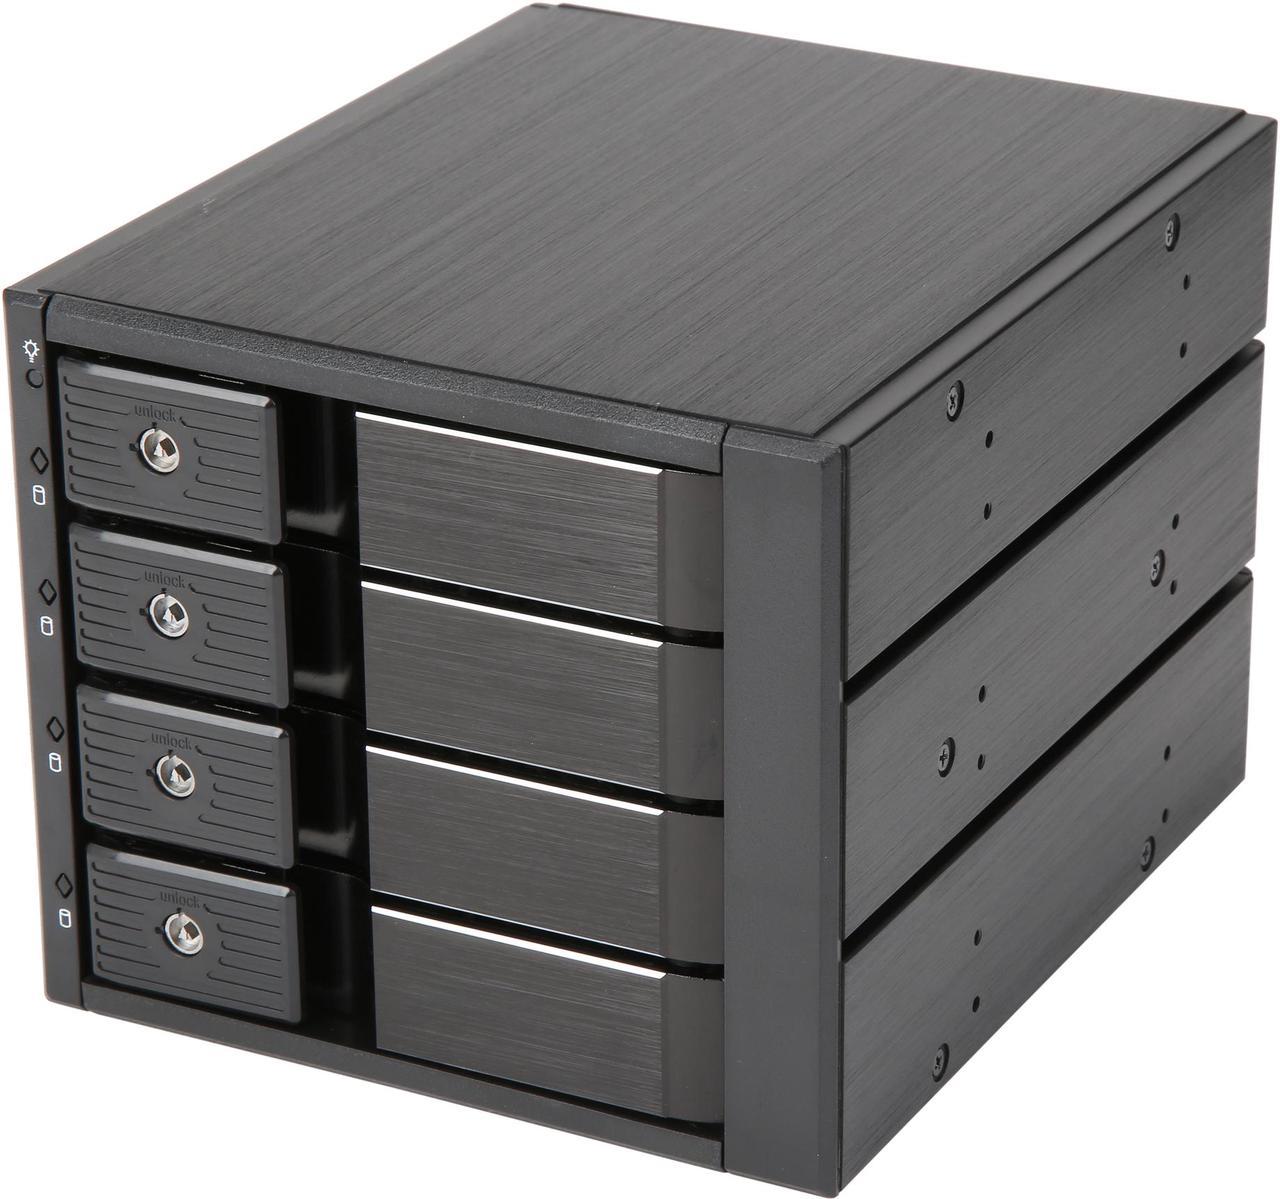
I purchased a hot swap 5.25in to 3.25in drive bay off of Newegg, which uses the SAS interface to handle all the data from the drives. It also comes with a cooling fan, although I don't know how effective this will be with solid bay doors. This then required me to buy a separate SAS PCI-E card and an adaptor cable due to differing SAS connector types.
I also purchased a fully modular power supply, since that would let me leave any unused cables outside the case. This improves air flow by not blocking air with thick cables that don't do anything useful. Air flow is a major issue with this case, because there are only two fans - an 80mm exhaust fan, and an 80mm intake fan that tries to pull air through a hole a few millimeters from the ground.
To solve this problem and the problem of insufficient cable pass through, I returned to tradition: case modding.
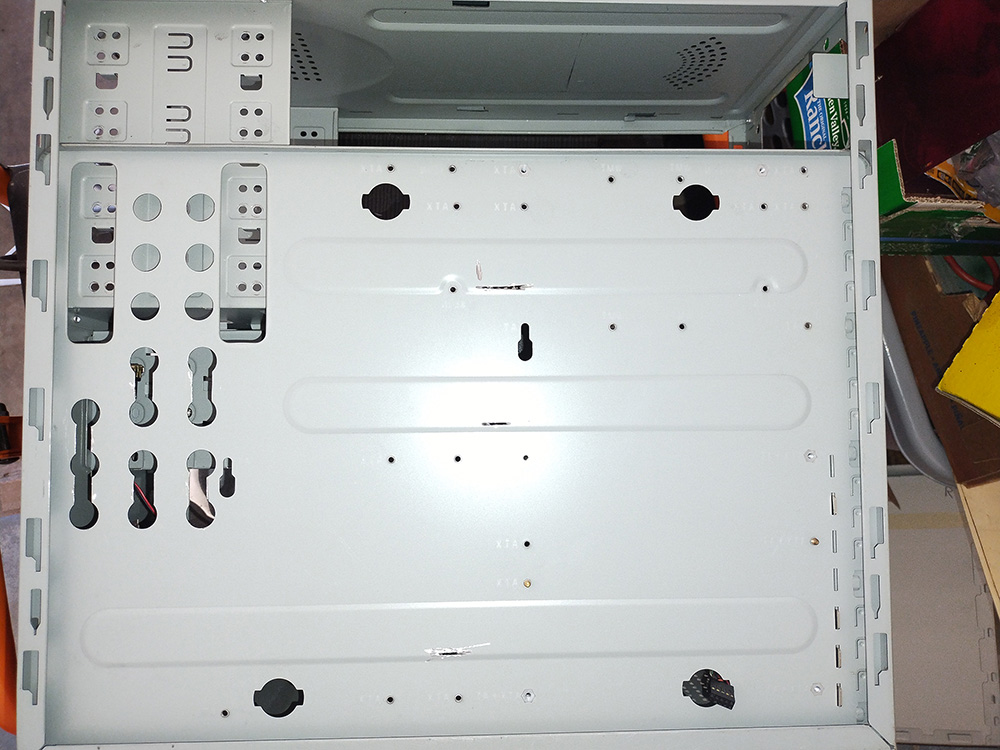
In the old days, people would dremel, saw, and mill computer cases to make them more useful. Since I didn't have a mill and there's no convenient local makerspace, that left me with the dremel and saw options. Unfortunately, I wasn't able to cut as cleanly as I wanted to, but I got the job done.
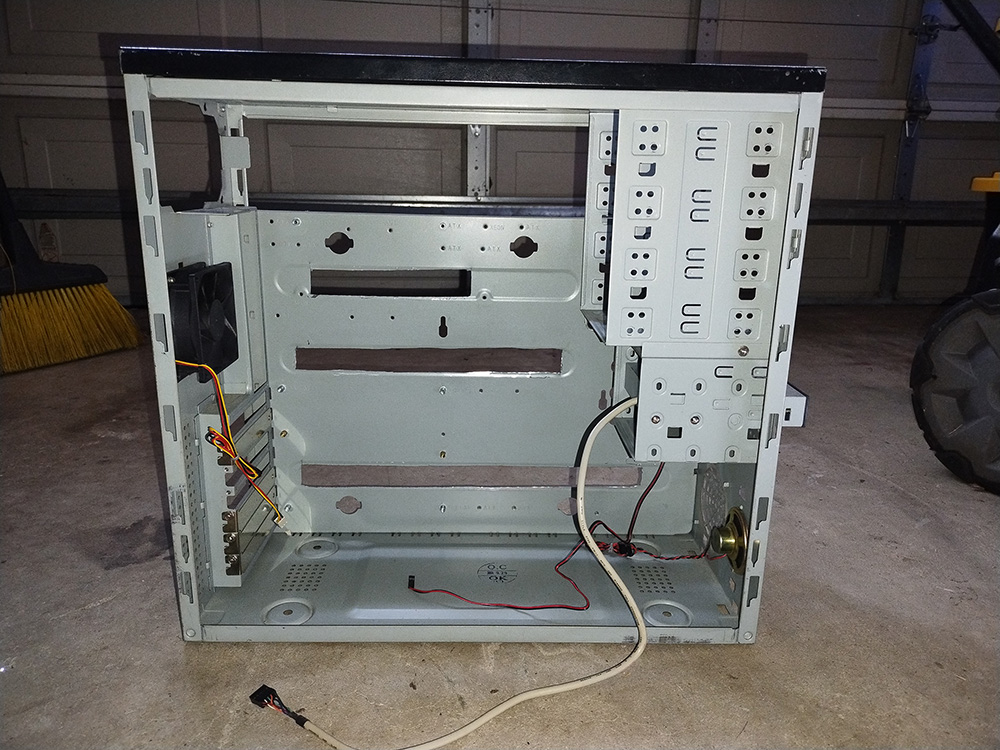
However, I deferred on the next step of the case modification, cutting holes in the case side panel for air intake. I happen to have a large number of 120mm fans, but figuring out where to place them to avoid collisions with other hardware is pretty difficult. So to help plan that out, I went ahead and installed the majority of the hardware into the case.
After the Install
Putting together the PC was a bit of a pain, due to the aforementioned poor cooler mounting.
The rest was pretty straight forward, at least for an experienced PC builder. The main issue, as I expected was cable management, because the power cables are thick and eat up a lot of internal volume.
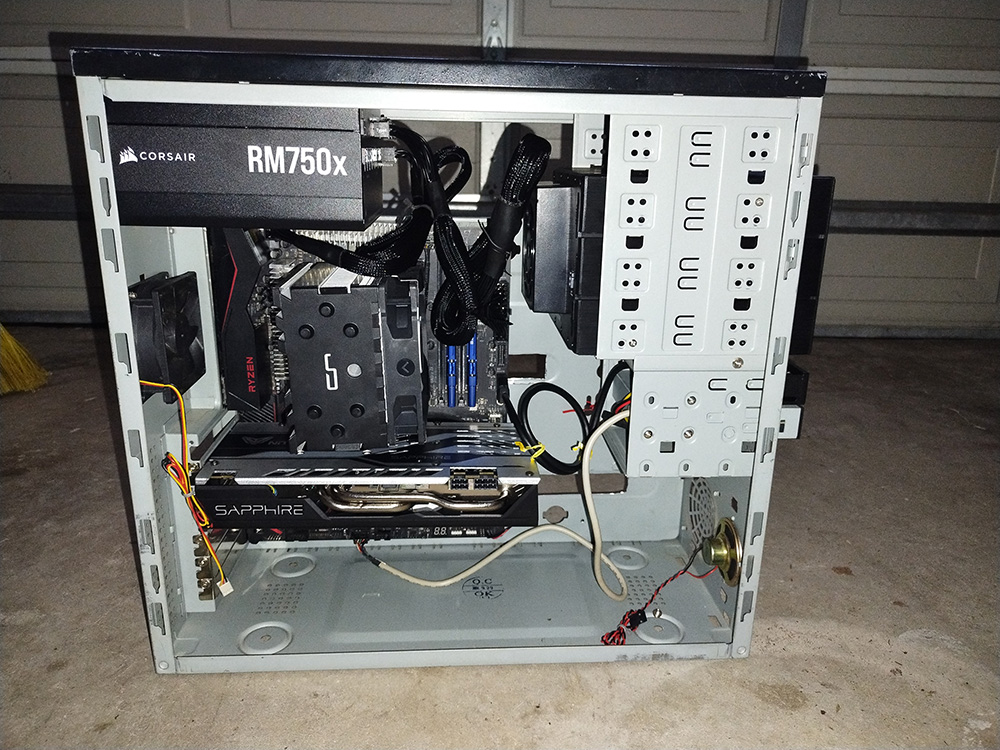
I discovered that I would need to probably at least remove the GPU to handle hooking up the front panel connectors for the case. And at this point, I hadn't received the SAS card and cable, either. So I decided I would go install TrueNAS Scale, do some initial configuration, and then shut the system down to do more work.
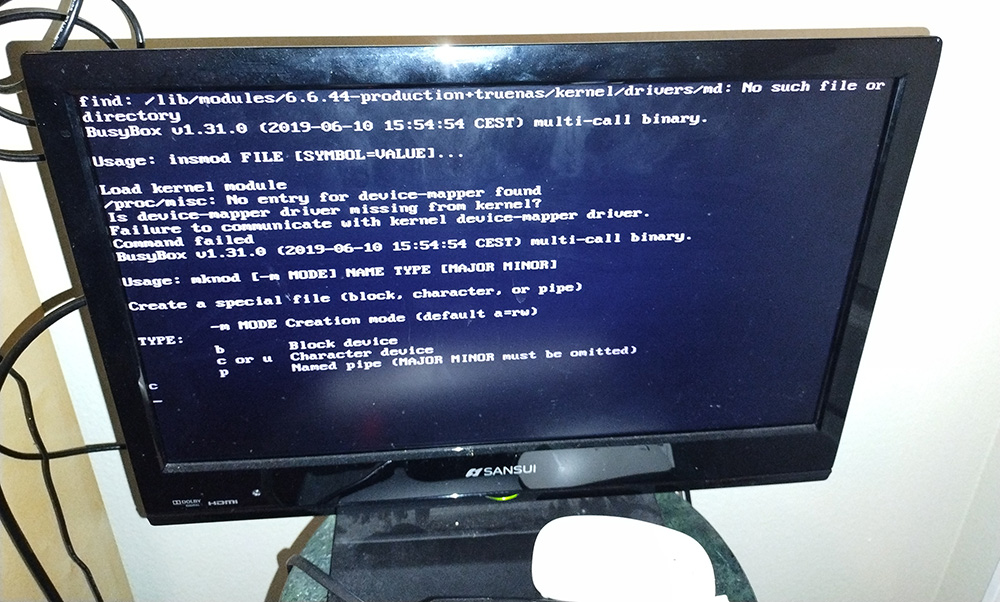
Unfortunately, what should have been a straightforward operation using my Ventoy flash drive failed. This means I now have to find either a cheap flash drive or an old flash drive, and use Balena Etcher to format the drive into an installation drive.
However, I was pleasantly surprised to see the computer worked, so all that hard work wasn't for nothing.
Next Steps
Not much is left to do, but what's there is pretty important:
- Find a flash drive to use to install TrueNAS Scale.
- Get the SAS adapter cable and card installed.
- Install the front panel and connect it to the motherboard.
- Figure out if I need slim 120mm fans and where can I put them.
- Cut the holes in the side panel and install the fans.
- Install the hard drives and get them configured.
- Get media onto the disk drives.
- Install a Plex docker image.
- Find a corner to stick the server in.
Let's see if I can get this done before Christmas.
