Quick Thoughts: TrueNAS RTL8127 Driver Install Tutorial
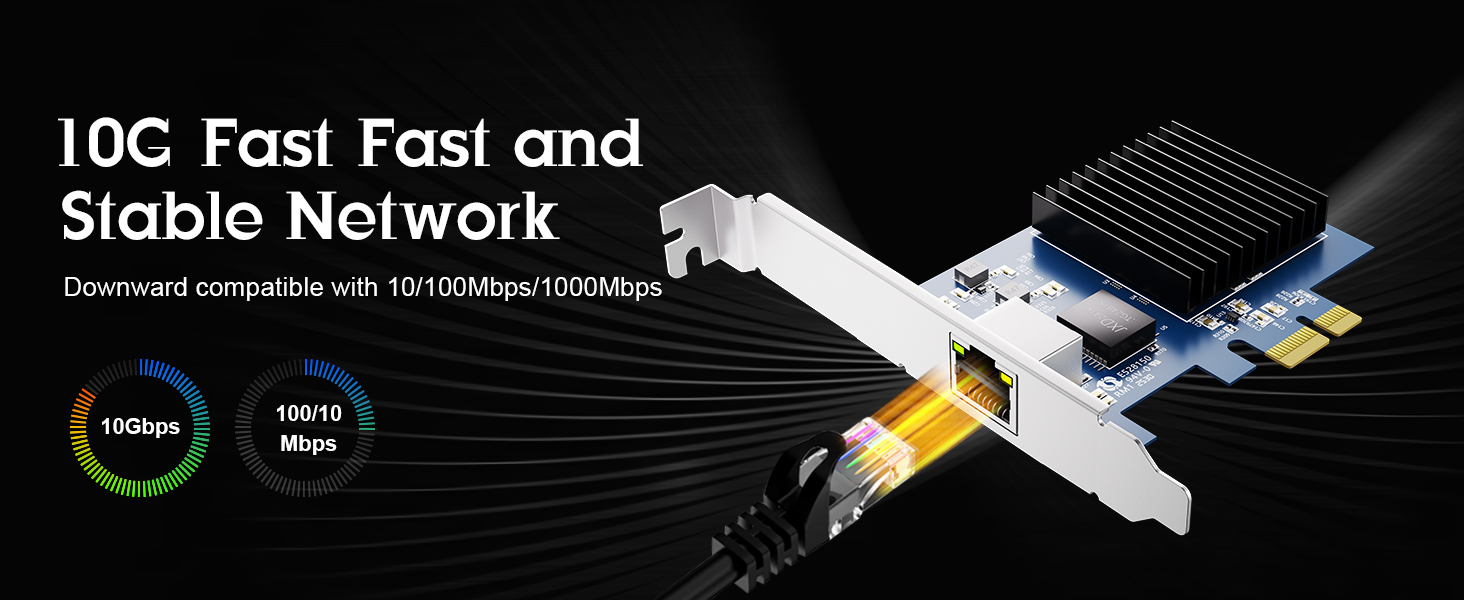
While tinkering with my TrueNAS server, I ran into a problem that might be worth sharing with the rest of you. It relates to installing RTL8127 drivers on versions 24.10+, but before 26.04, which integrates the driver into the OS. TrueNAS 26.04 is very much a beta OS release at the moment, so if you're looking to update an existing TrueNAS server, you might need the help.
Table of Contents
- What is RTL8127?
- What You Need
- Step 0: Install the Card
- Step 1: Enable Console
- Step 2: Figure Out Where to Place the Files
- Step 3: TrueNAS Shell
- Step 4: Make the Script Executable
- Step 5: Run the Script
- Step 6: Watch for Errors
- Step 7: Copy the Driver
- Step 8: Make the Driver Persistent
- Step 9: Update Your Network Settings
- Updates
What is RTL8127?
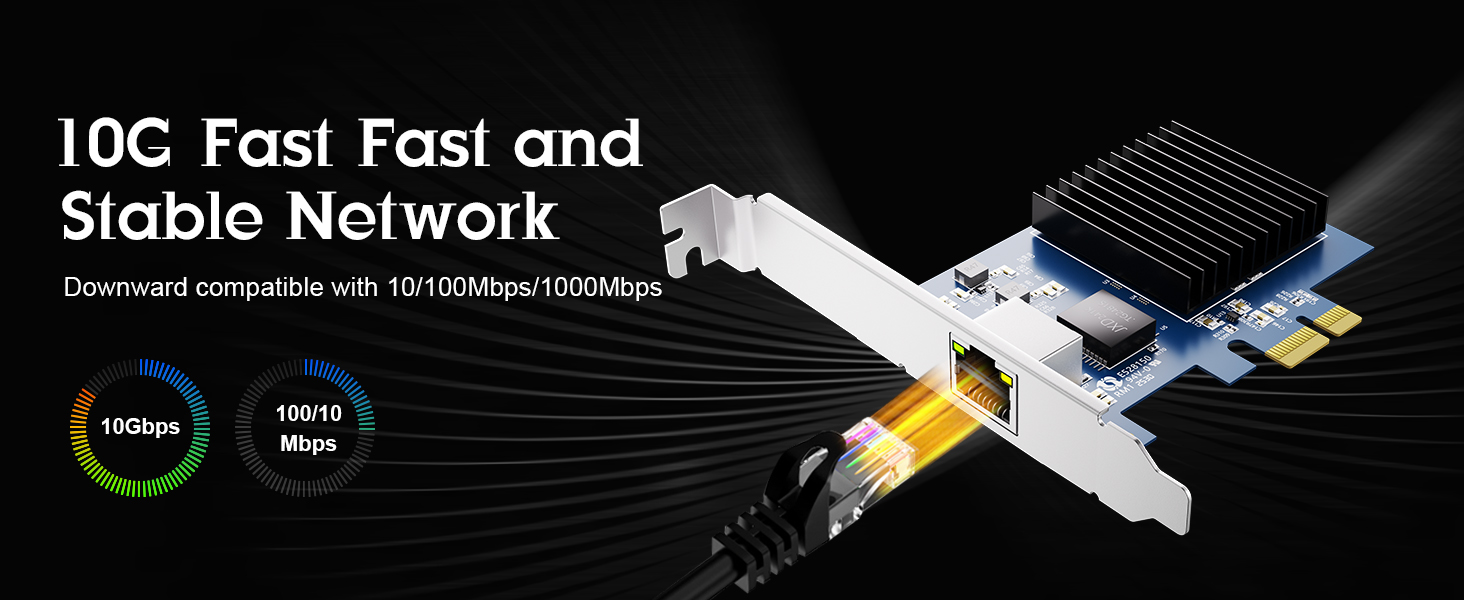
RTL8127 is a chip made by Realtek that runs 10 gig ethernet network interface cards. In particular, it's used by a number of cards that use PCI-E x4 (the shortest slot) connectors, which are perfect for slapping into systems that reusing old gaming motherboards.
You can find these cards for $35-70 in July 2026, which is a pretty good price, all things considered.
The downside of this chip is that it's not supported by TrueNAS's built-in drivers, so you can't just plug them into a PCI-E x4 slot and get up and running. There's a bit of work that needs to be done, but luckily, there's a GitHub script for that.
Unluckily, despite being made with AI, the person who made it didn't think to make a tutorial.
So here's mine.
What You Need
- TrueNAS 24.10+, pre-26.04.
- RTL8127 network interface card.
- TrueNAS RTL8127 driver build script
- Realtek drivers
Always run a scan on the script and driver source code before proceeding with this process.
Step 0: Install the Card
You can install the RTL8127 card before compiling the driver. However, it will not show up as an interface in TrueNAS' web GUI until the process is complete.
Step 1: Enable Console
Once your RTL8127 has arrived, the first thing you should do is go to TrueNAS System > Advanced Settings:
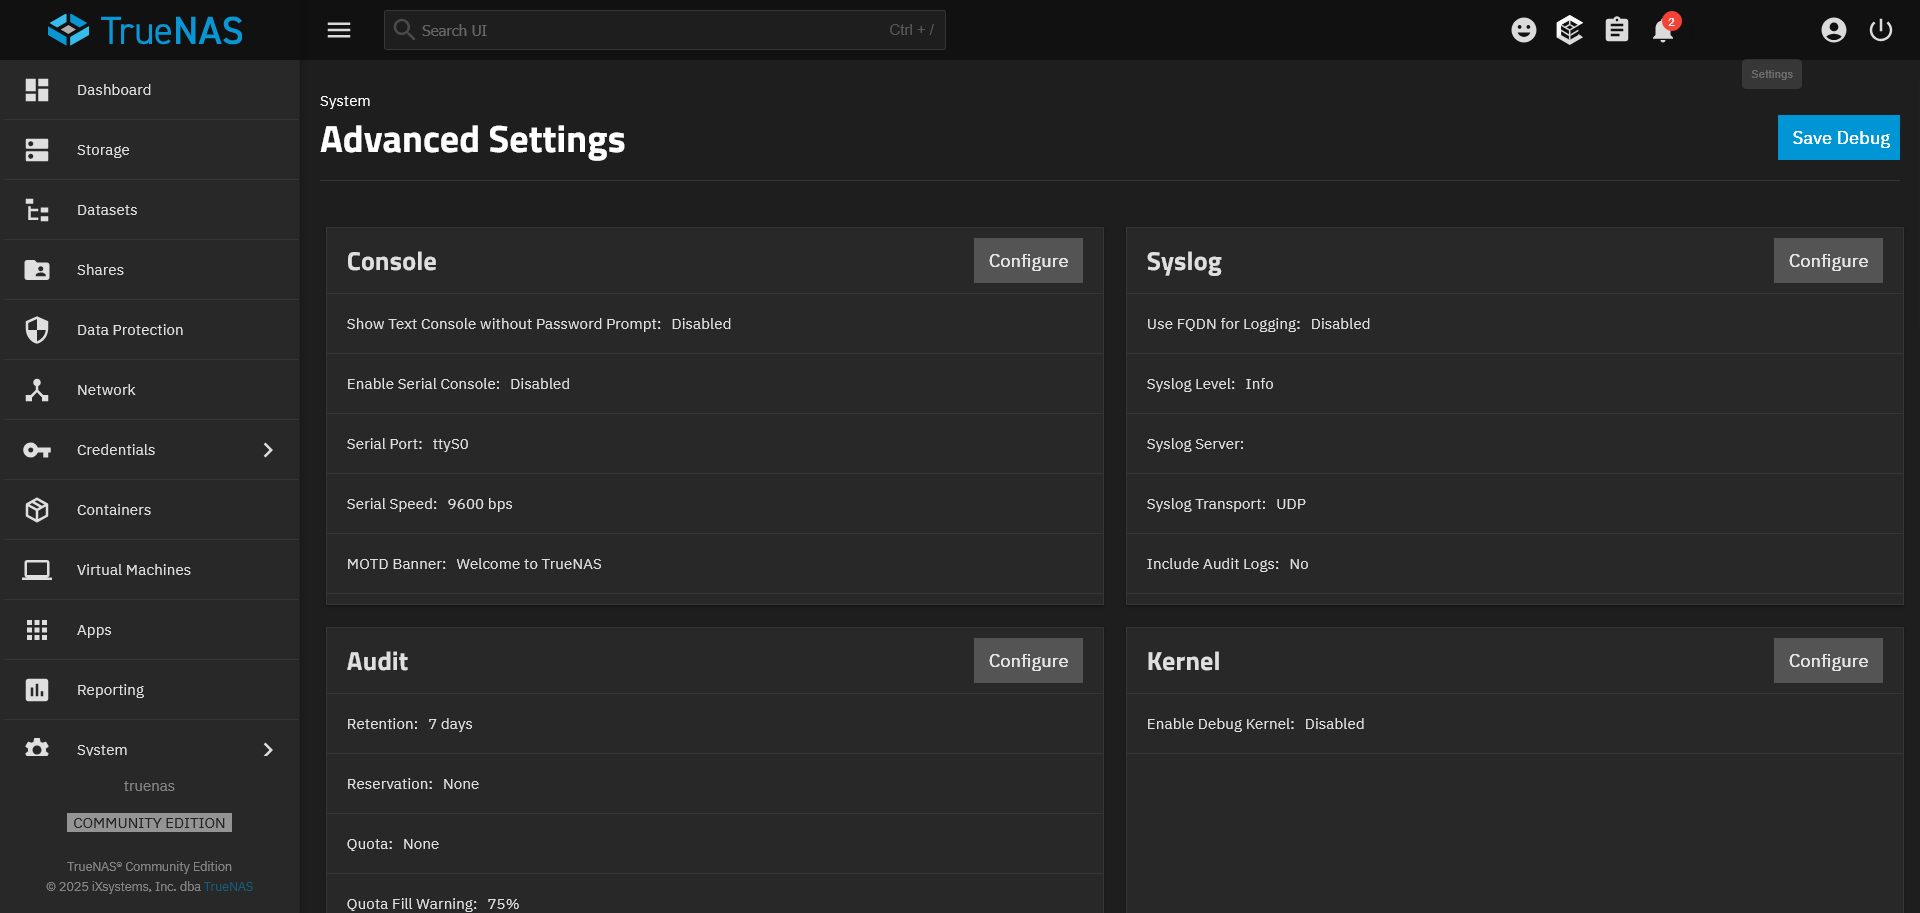
You're going to need to have the text console enabled, which is something you might have disabled.
Click Configure on the Console block, click through the warning about changing settings, and you'll see this:
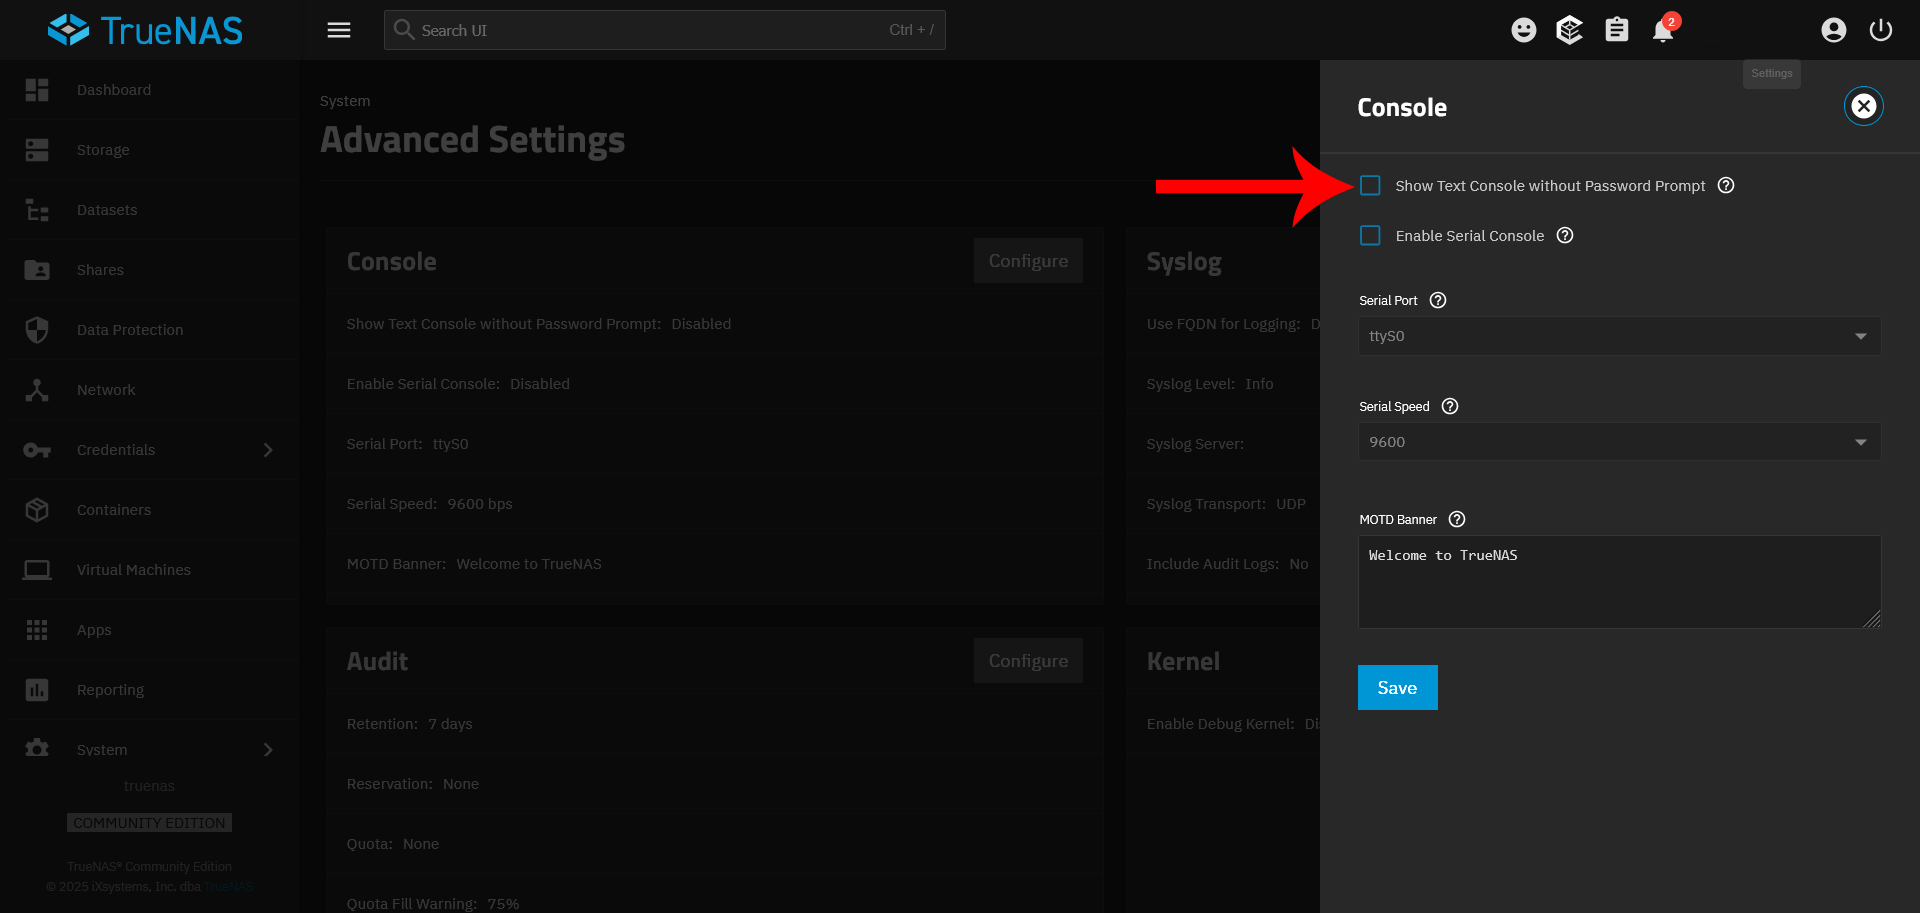
As the red arrow indicates, you'll want to click Show Text Console without Password Prompt. If you have a monitor and keyboard connected to the server, this setting allows you to change settings without having to log-in. This setting should be disabled for security, but we'll need it later.
Click Save.
Step 2: Figure Out Where to Place the Files
Next, you'll need to figure out where to put all the files. In TrueNAS, your file locations will be something like /mnt/tank/drivers/r8127, /mnt/ssd-storage/r8127, /mnt/[DRIVE]/Apps/Filebrowser.
If you have the File Browser app on your NAS, I highly encourage the use of a File Browser folder, since you may have to redo this process if there's a TrueNAS update.
Since I don't know where you will put it, I'll use [PLACEHOLDER-MOUNT].
After you extract the RTL8127 driver files from the .tar.bz2 file they come in, you should set up the folder like this:
[PLACEHOLDER-MOUNT]
├── truenas_build_r8127_driver.sh
├── r8127-<version>/
│   ├── src/
│   ├── Makefile
│   └── ...
Step 3: TrueNAS Shell
Get into the shell command line interface (CLI) by:
System → Shellfrom the TrueNAS web interface- SSH
- Text Console
You'll then use the cd command to navigate to where the script is:
cd [PLACEHOLDER-MOUNT]
Step 4: Make the Script Executable
You'll need to give the script permissions to execute with the following command:
chmod +x truenas_build_r8127_driver.sh
Verify with the following command, which should show the executable permissions (x):
ls -l truenas_build_r8127_driver.sh
Step 5: Run the Script
Use sudo to execute the script:
sudo ./truenas_build_r8127_driver.sh
Depending on the script, it may:
- verify the TrueNAS version
- install required build tools
- compile the driver
- build a kernel module
- install the module
- update module dependencies
Compilation may take several minutes. All of this takes place in a Docker container, which is why the
Step 6: Watch for Errors
Monitor the terminal for messages. If the script reports an error, note:
- the exact error message
- the command that failed
- any missing dependency
- any compiler error
You'll need the error messages for troubleshooting.
Some common issues you might face:
Permission denied
If you receive Permission denied:
Run: chmod +x truenas_build_r8127_driver.sh
Script not found
Verify your current directory: pwd
List files: ls -aux
You should be in the same folder as the build script before trying to initiate it.
Source files not found
Confirm that the driver source exists under [PLACEHOLDER-MOUNT] with: ls -aux
The script can't build the driver if the source files are missing or stored in a different location.
Build failed
Possible causes include:
- incompatible TrueNAS version
- missing compiler tools
- missing kernel headers
- incorrect driver version
- unsupported kernel changes
Review the compilation output to identify the first reported error.
Step 7: Copy the Driver
Go to the [PLACEHOLDER-MOUNT] to see the folder generated by Docker during the build process:
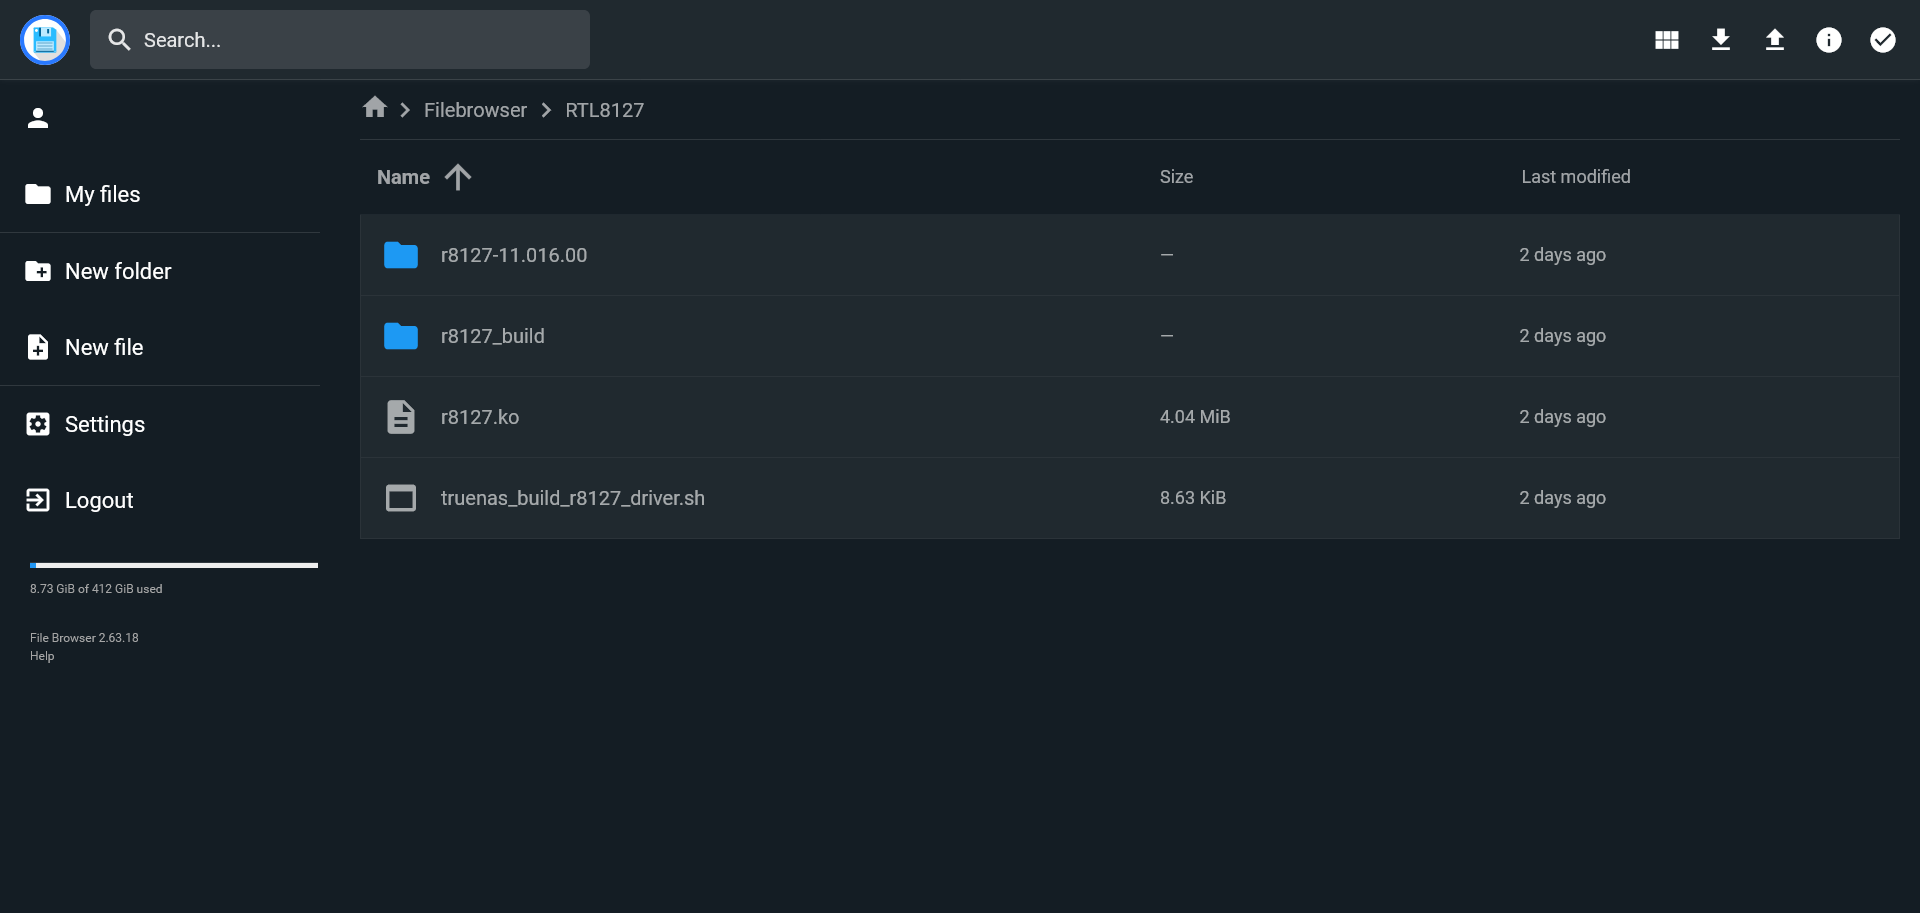
Go into the r8127_build folder until you reach the rtl8127 subfolder. Scroll down until you find the r8127.ko file:
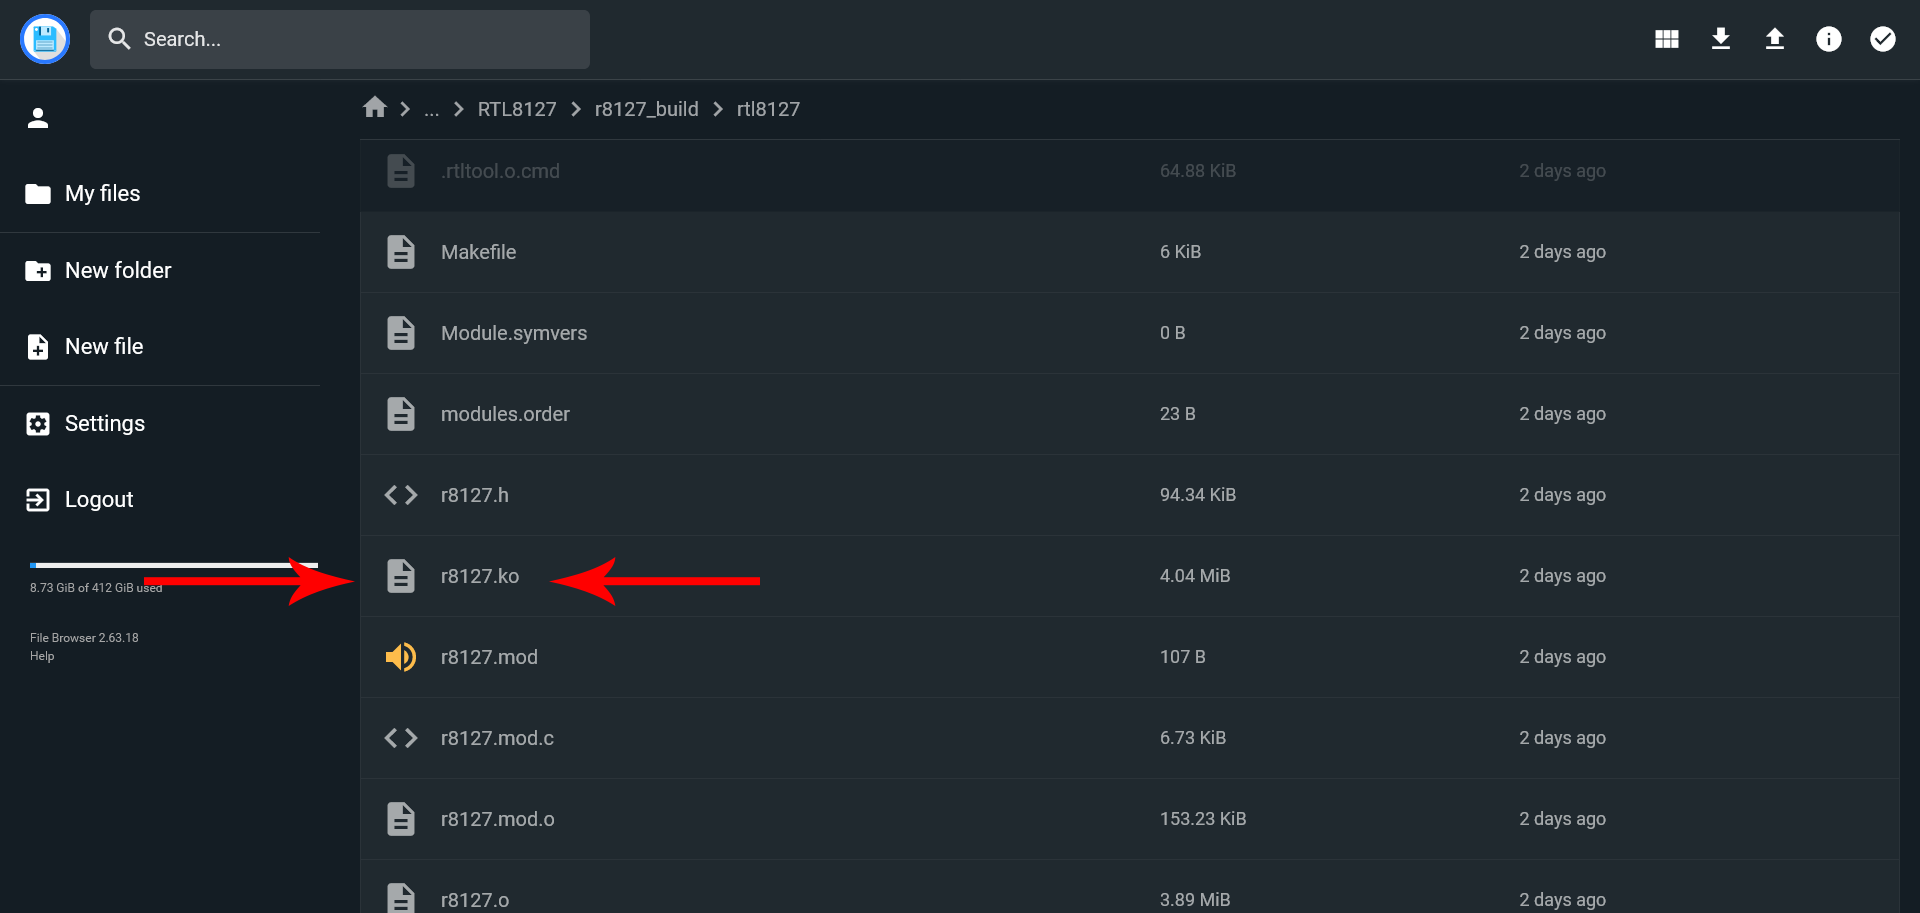
Copy this file to the main folder containing the build script.
Once that's done, you can delete the build folder.
Step 8: Make the Driver Persistent
At this point, rebooting the system will deactivate the driver. Now that it's copied, go to System Settings -> Advanced -> Init/Shutdown Scripts.
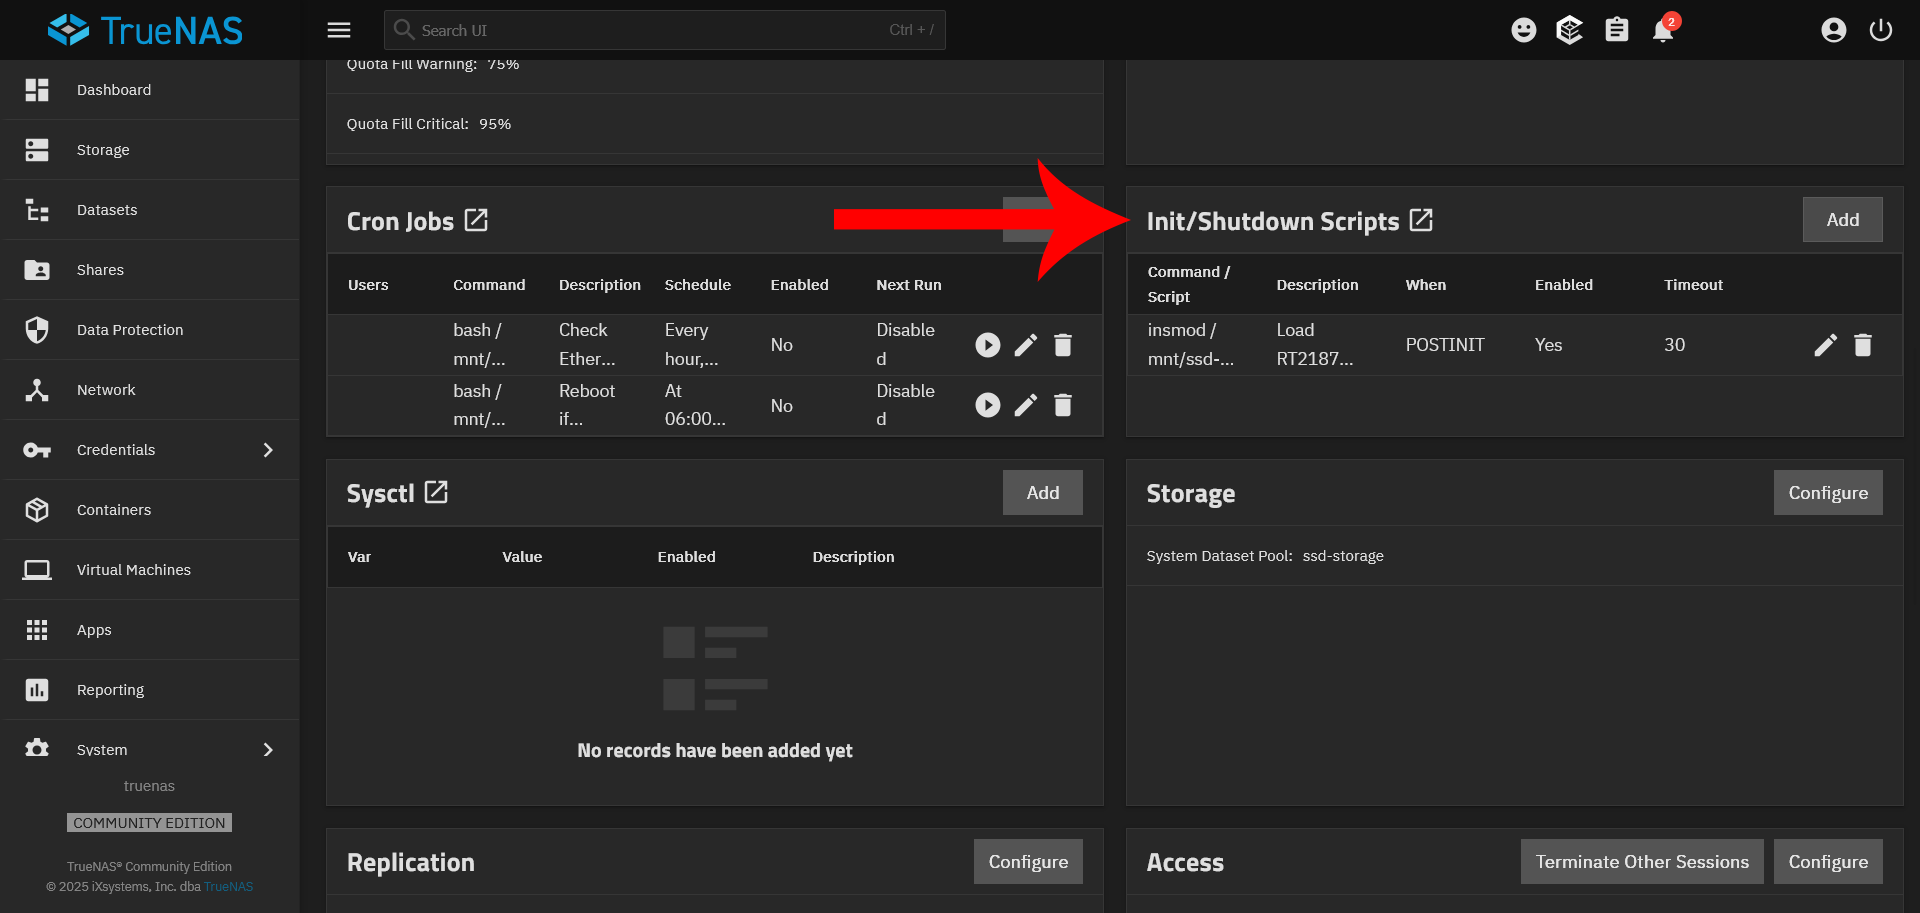
Click Add, which brings up this interface:
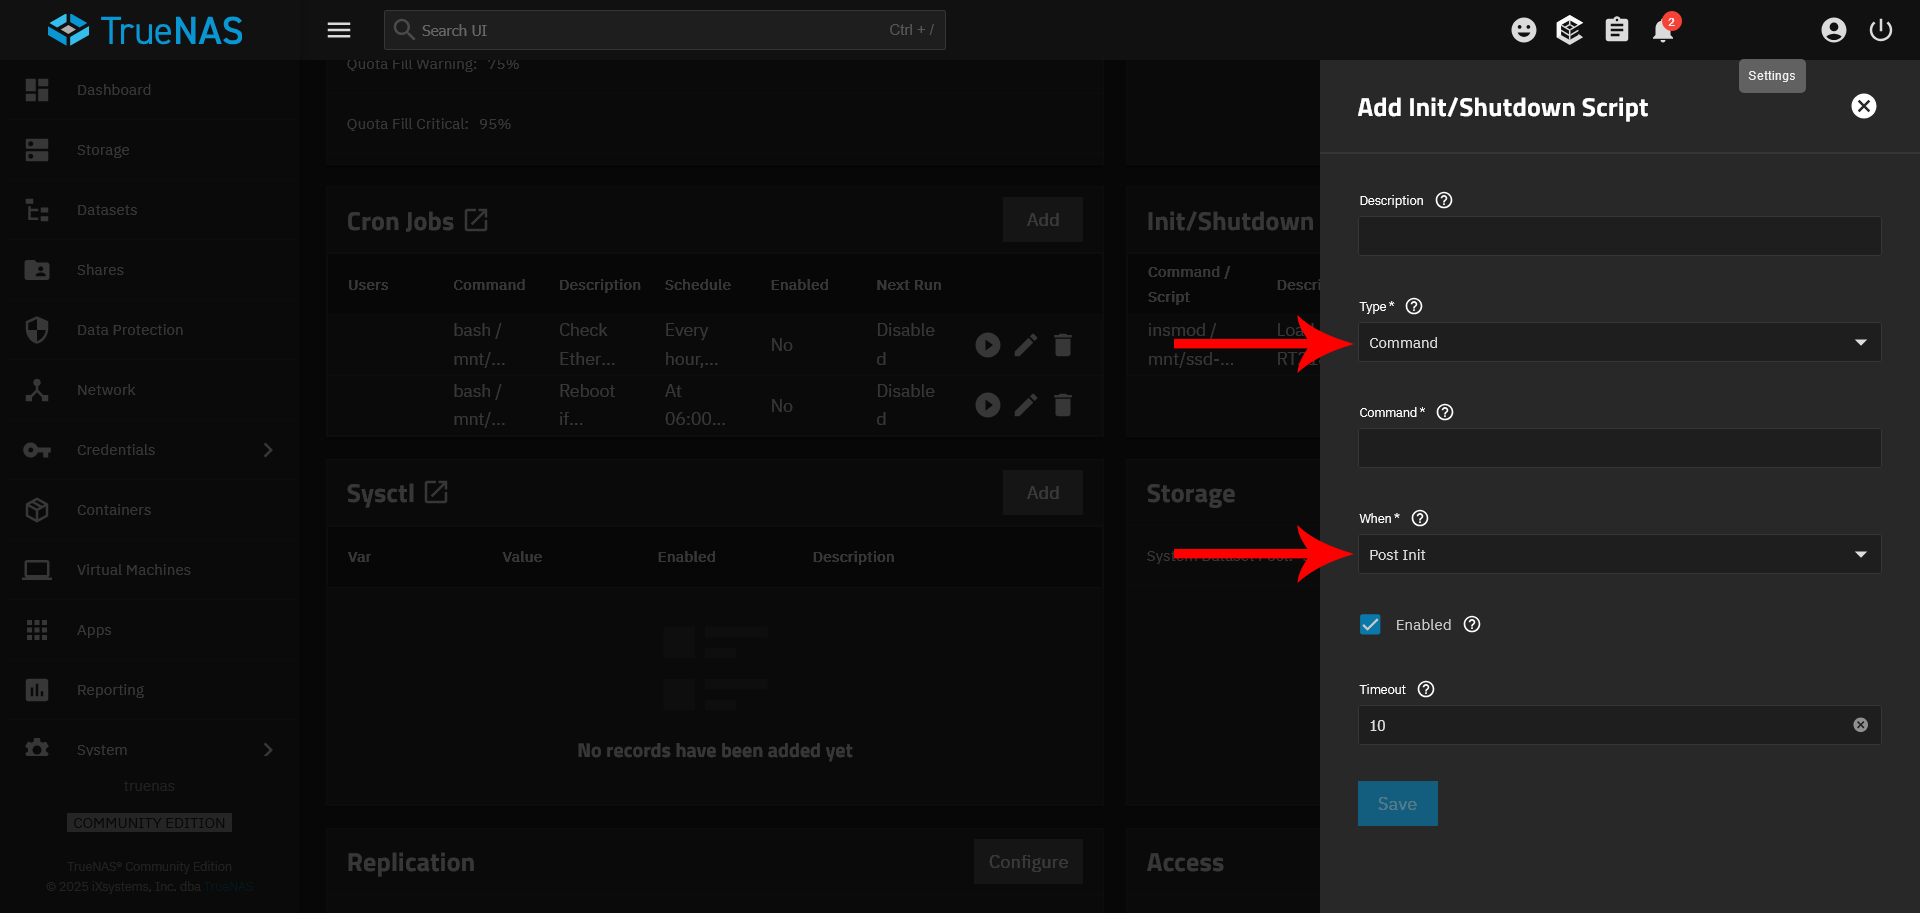
Configure the script with the following settings:
- Type: Command
- Command:
insmod [PLACEHOLDER-MOUNT]/r8127.ko - When: Post Init
- Enabled: Checked
Click Save to complete the script.
At this point, it is safe to shutdown the server to install the hardware, or reboot to bring up the Text Console.
Step 9: Update Your Network Settings
Now that your driver is being persistently loaded, it's time to change the network settings via the Text Console:
This allows you to remove the settings from the original interface and apply them to the new interface.
If you do not need to copy the settings over, you can simply configure your new interface through the web GUI.
Updates
When a newer driver or OS version is released:
- Download the updated source files.
- Replace the old source directory.
- Run the build script again.
- Replace the copied driver with the newest version.
- Reboot.
As noted in the script:
This script must be re-run after every TrueNAS SCALE version update to recompile the driver against the new kernel headers.
This process may require the Text Console to execute.